
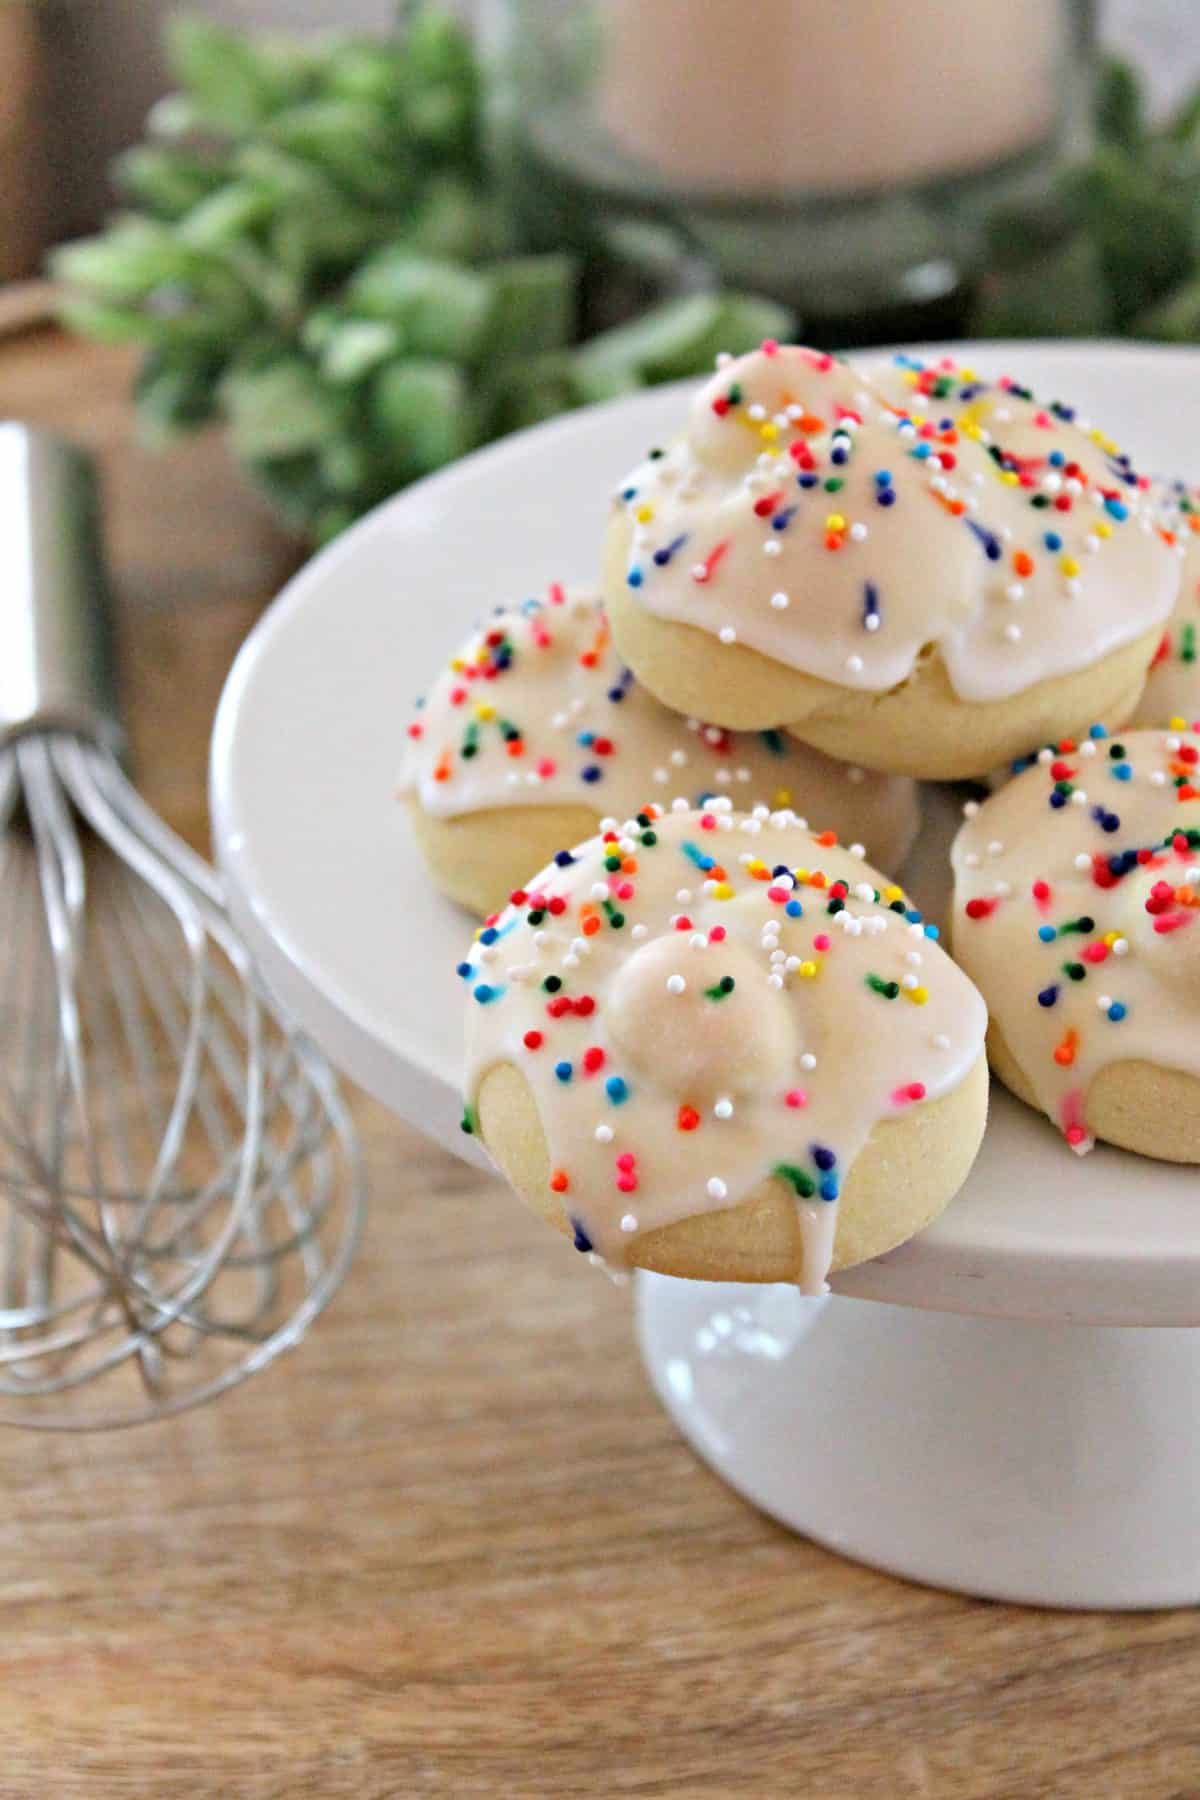
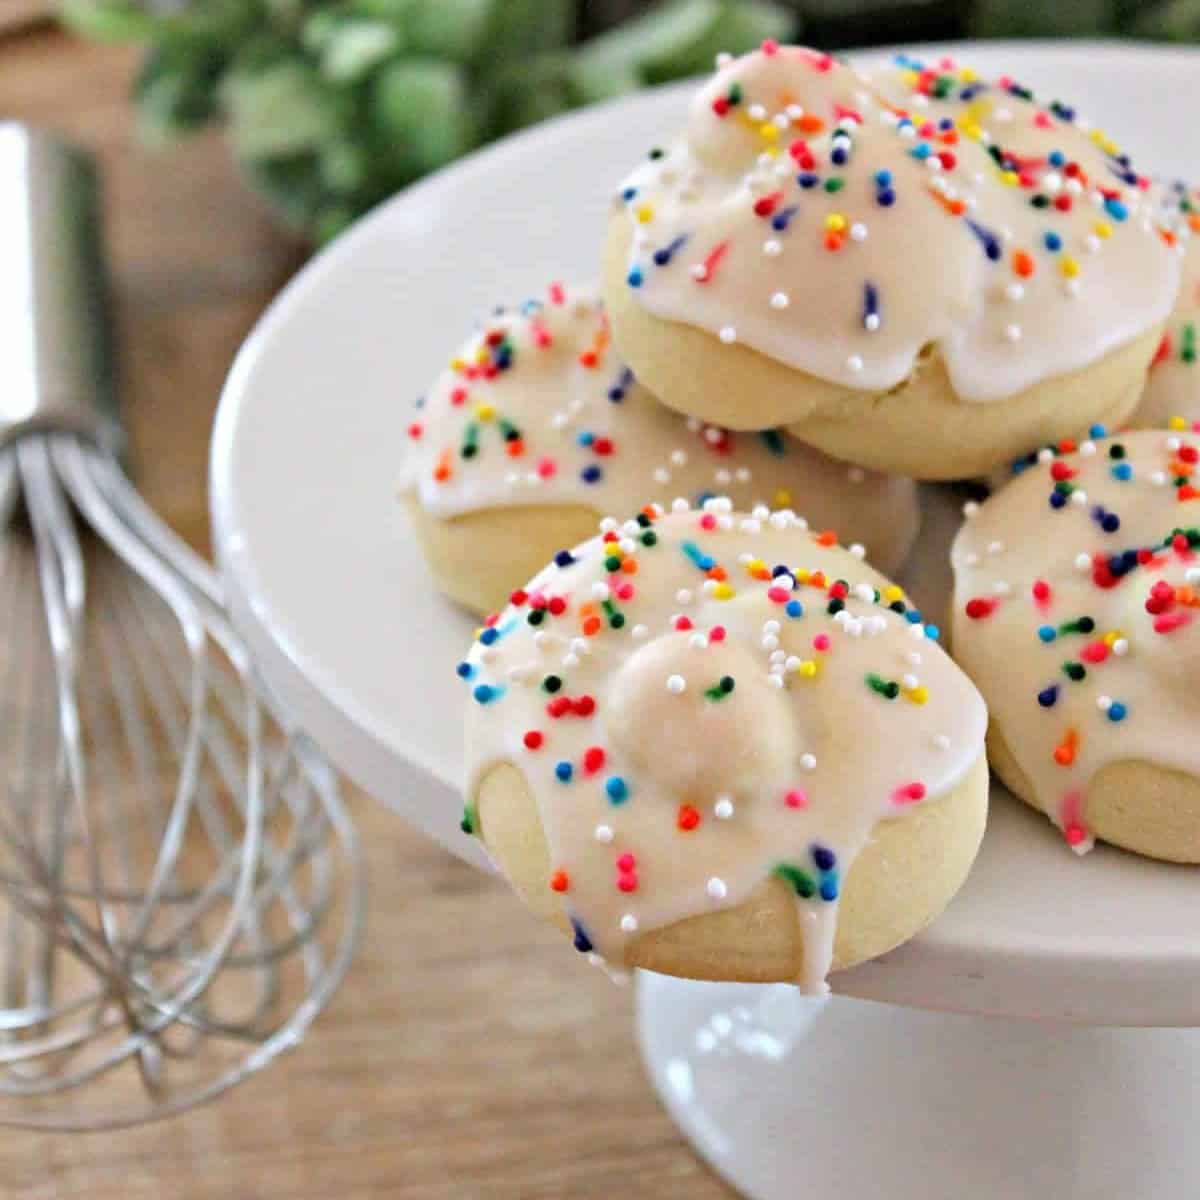
Italian Knot Cookies! These tender, cakey cookies are also known as unicetti, taralli dolci, anginetti or simply Italian Easter cookies. A fun treat to make and eat!
Note: This recipe was originally posted on June 29, 2011 and was updated on April 11, 2012.
This post may contain affiliate links, which means that, at no extra cost to you, I may earn a small commission if you click a link and purchase an item I’ve recommended. Thanks for your support in running this blog!
Italian Knot Cookies are also known as Italian Easter Cookies since they’re a cookie that is often made for special occasions such as holidays, weddings and other celebrations.
They are made from a mildly sweet, tender dough that is more soft and cakey than cookie-like, and glazed with a flavored icing before being decorated with colorful nonpareils or sprinkles.
Ingredients
- All-purpose flour
- Baking powder
- Baking soda
- Salt
- Unsalted butter
- Granulated sugar
- Eggs
- Vanilla extract
- Fresh lemon juice
- Lemon zest {optional}
- Confectioners’ sugar
- Milk
- Almond, lemon, or anise extract
- Nonpareils or sprinkles
Equipment & Supplies
- Medium bowl
- Stand mixer
- Spatula
- Measuring cups & spoons
- Cookie scoop
- Rolling pin
- Baking sheets
- Parchment paper or silicone baking mat
- Cooling rack
- Small bowl
- Whisk
- Spoon
- Plastic wrap
You can find all of the equipment that I find most useful for this recipe in the “Cookie Baking Supplies” section of my Amazon storefront!
Instructions
Cookie Dough Preparation
To begin making Italian Knot Cookies, start by creating the cookie dough. In a medium-sized bowl, combine flour, baking powder, baking soda, and a pinch of salt. Set this aside for later use.
Next, in the bowl of a stand mixer, blend together butter and sugar until achieving a light, fluffy consistency. Gradually add eggs one at a time, ensuring thorough mixing after each addition. Don’t forget to scrape down the sides of the bowl to ensure everything is thoroughly combined.
Add vanilla extract and a hint of lemon juice. If you desire a citrusy twist, include some lemon zest in this step.
Gradually incorporate the dry mixture into the wet ingredients, ensuring it’s just combined without overmixing. Chill this resulting soft, sticky dough in the refrigerator for at least an hour.
Shaping the Cookies
Once the dough is thoroughly chilled, dust your work area with flour to prevent sticking. With lightly floured hands, scoop out portions of dough, rolling them into smooth balls a tad smaller than a golf ball.
Now, transform each ball into a 7-inch rope and carefully tie them into knots. One end should peek up through the center. Place these knots on a prepared baking sheet, ensuring a 1½-inch space between each cookie.
Baking & Icing
Preheat your oven to 350 degrees Fahrenheit while shaping the cookies. Bake them for 12-15 minutes until they’re lightly golden and puffed. Avoid over-baking; keep an eye on them after 10 minutes to ensure they don’t brown too much at the bottom.
Once baked, allow the cookies to cool before icing.
For the icing, whisk together confectioners’ sugar, milk, and extract until smooth. Adjust the consistency by adding more sugar to thicken or a touch of milk to achieve the perfect drizzling texture.
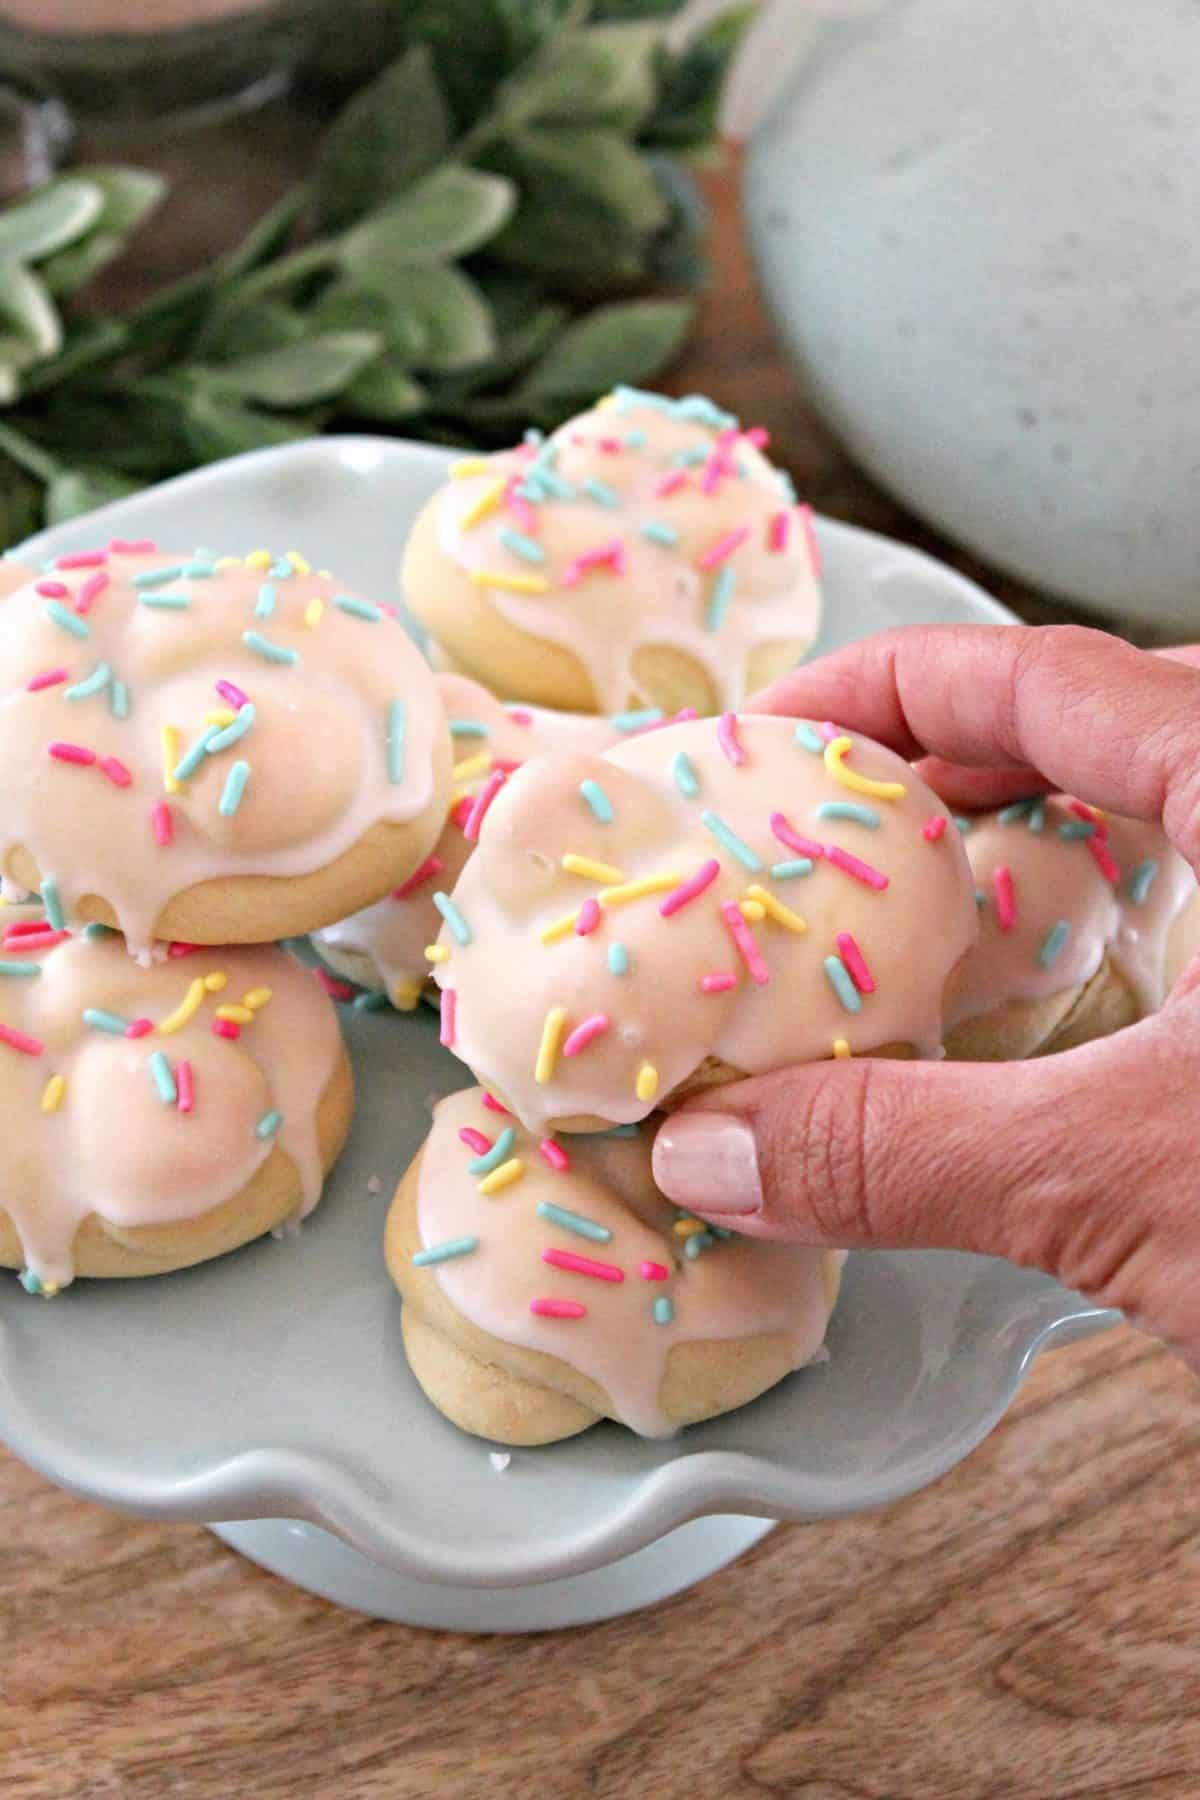
When the cookies are cool, dip each one upside down into the icing, letting the excess drip off. Flip them back over and place them on a cooling rack on a baking pan, ready for the finishing touches.
Sprinkle nonpareils or your favorite sprinkles onto the cookies while the icing is still wet. Let the icing set completely before packaging or serving these delectable treats!
Expert Tips
The dough for these cookies comes together very quickly, but will need to be refrigerated for about an hour to make it easier to handle and shape. That being said, here are a few tips to make sure your cookies turn out perfectly:
- Scrape down the sides of the bowl to ensure that all the butter and egg is well-blended before adding the flour mixture.
- Don’t over-mix or over-handle the dough. Too much mixing or handling will make the cookies tough instead of light and tender.
- The bake time for these cookies should be between 12-15 minutes, but every oven is different. I like to check my cookies a few minutes early to make sure they’re not browning too much. The tops should look dull and they should be puffed and slightly golden on top and around the edges. The bottoms should be golden brown but not too dark.
- Cool the cookies before icing. Icing the cookies before cooling completely can make the glaze extra runny, and most of it will drip off.
- Make sure to add the nonpareils and sprinkles while the icing is still slightly wet, otherwise they won’t stick!
Shaping Italian Knot Cookies
The shape of Italian Knot Cookies or Italian Easter Cookies may look a bit intimidating to try, but it’s actually relatively easy to master with some practice!
First, you’ll want to lightly flour the surface on which you’ll be shaping the cookies as well as your hands as the dough can be sticky. Use a cookie scoop or a tablespoon measure to scoop out the dough to ensure that each dough ball is equal in size. Roll the dough into a smooth ball between your hands, then place the ball on the floured surface and roll it into a rope about 7 inches in length.
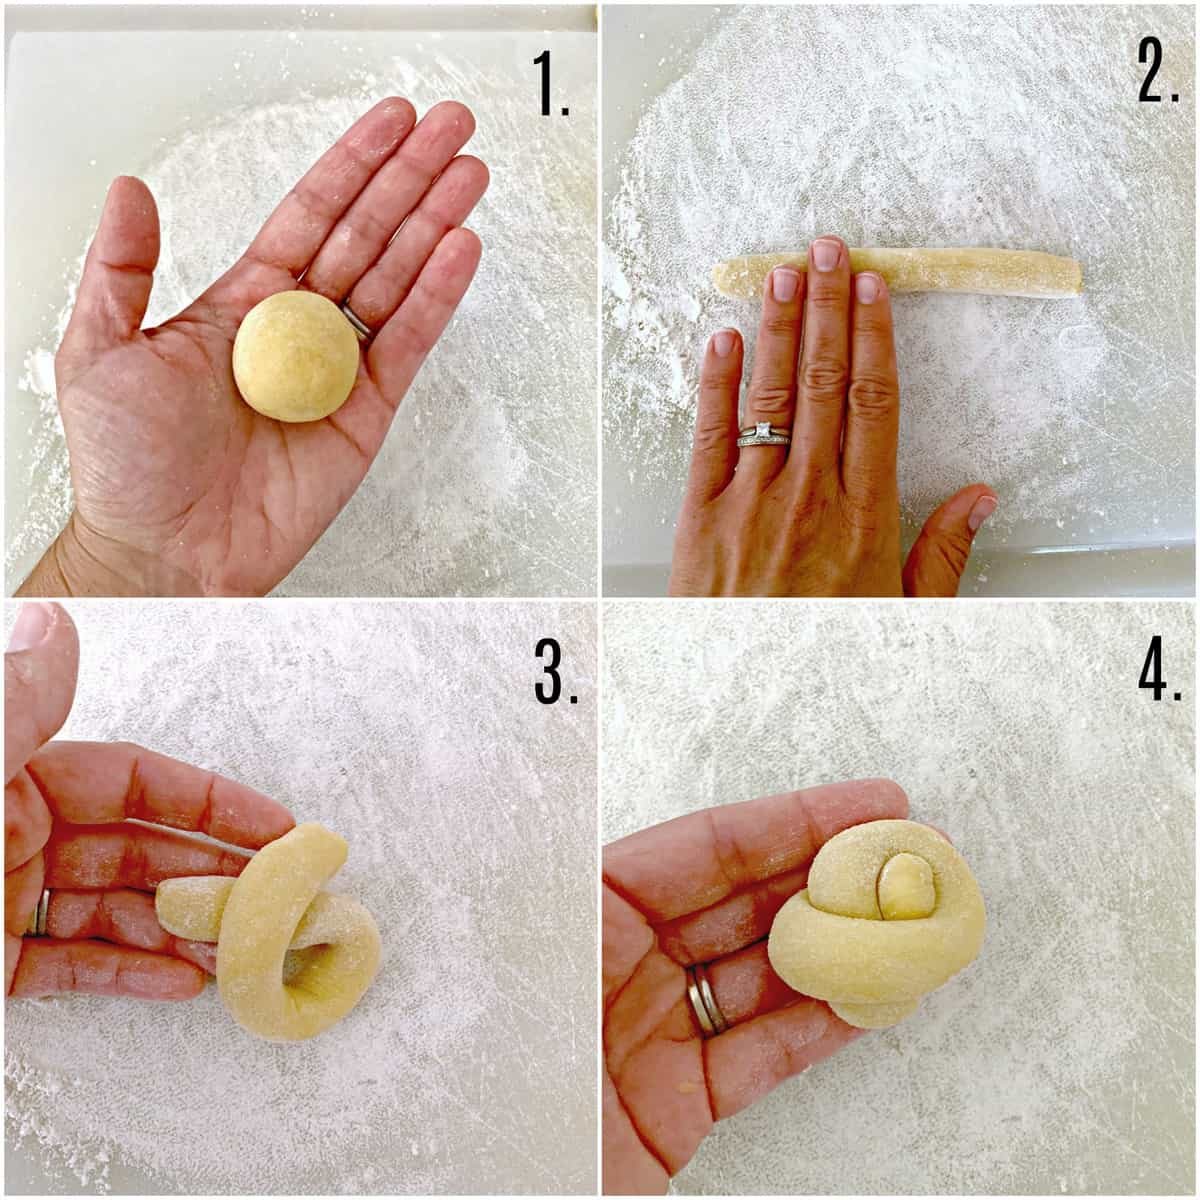
Here’s the part where it becomes a “knot”: Take one end of the rope in each hand and bring them up into a “U” shape. Cross one side over the other forming a hole or loop in the center. Carefully tuck on end of the rope through the loop to create a “knot” — just as you would knot a ribbon or string.
That’s it! It may take a few practice rounds to get it to look right, but eventually you’ll get the hang of it {and have a few laughs in the process}. This is a very fun task for little ones to help with!
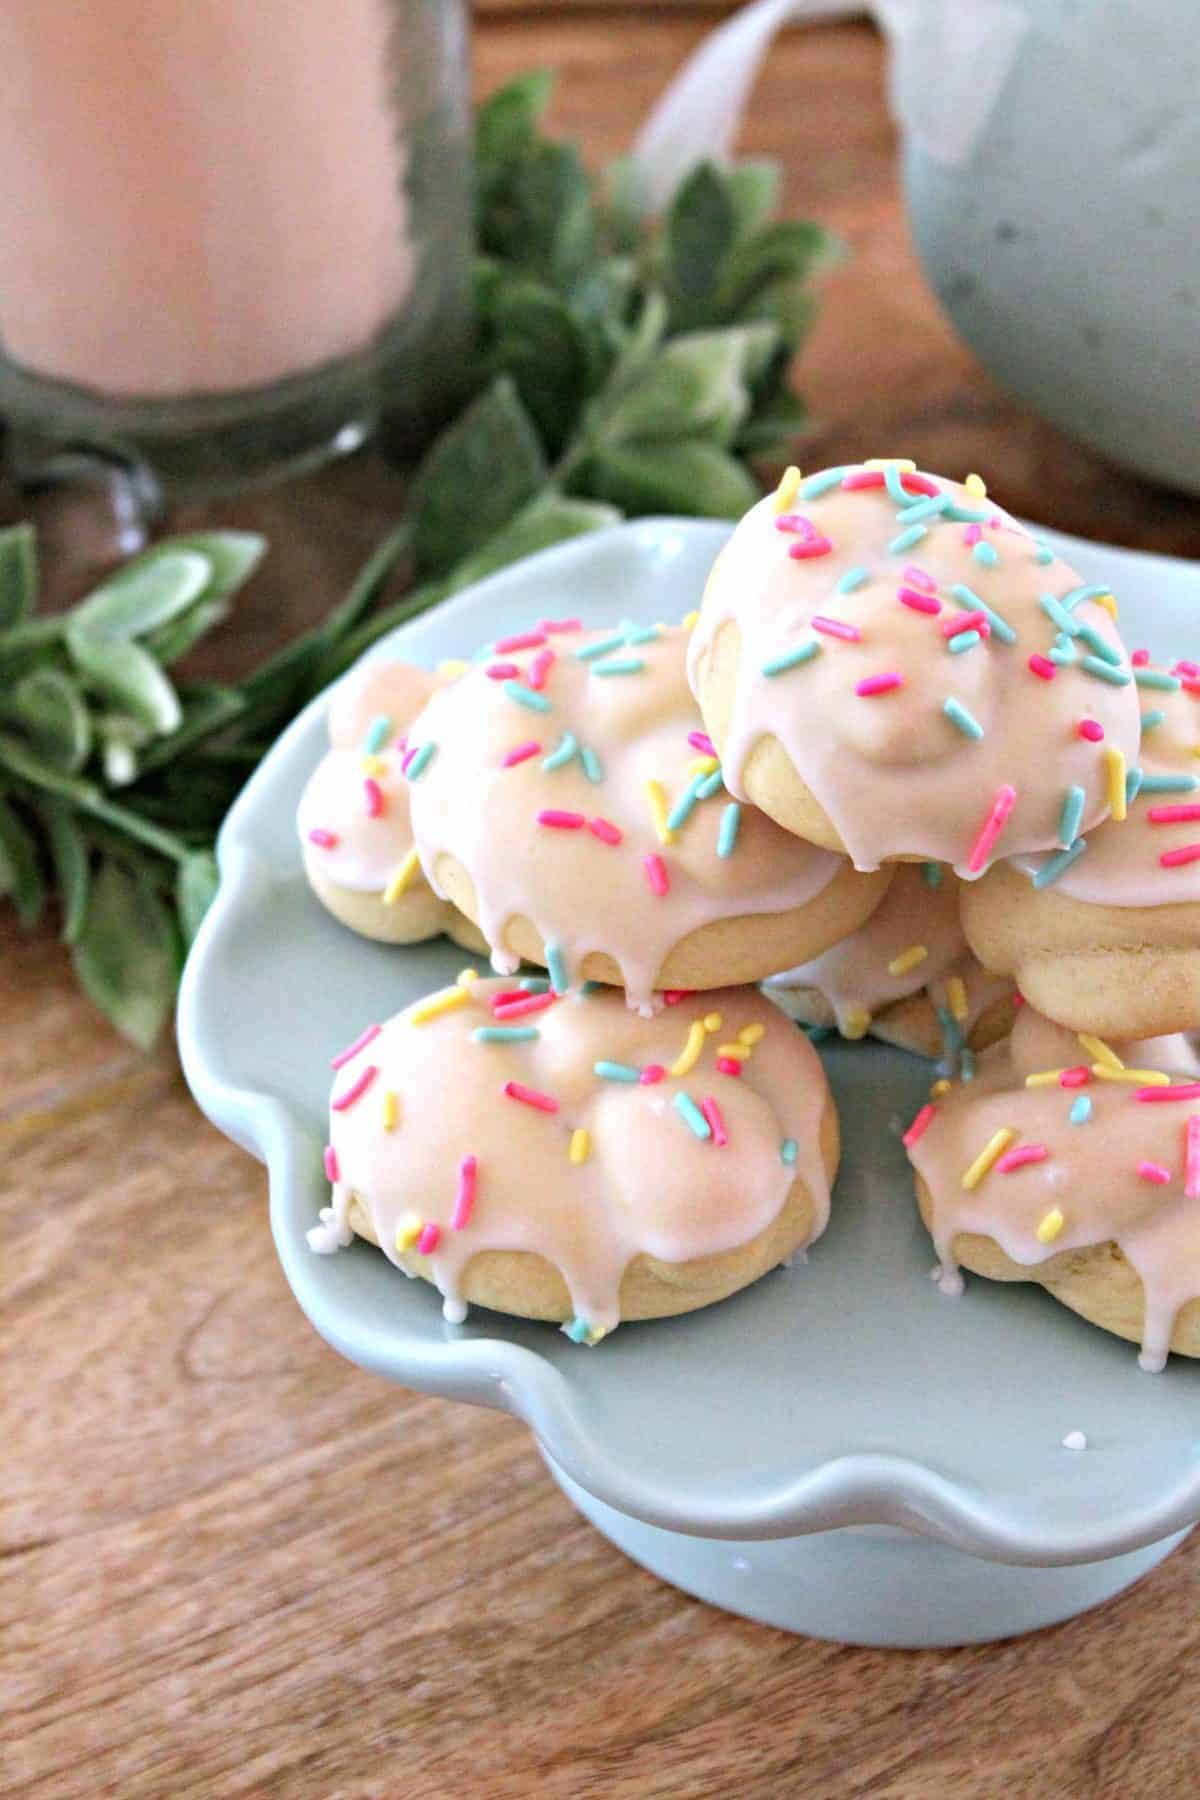
If you’ve given up on your cookie-knotting skills altogether, you can also shape these into rods, twists and rings {like little donuts!}. No matter how you choose to shape them, they’ll still be delicious!
Recipe FAQ’s
Yes, you can! Wrap the dough tightly in plastic wrap or place it in an airtight container before freezing. Thaw it overnight in the refrigerator before using.
Definitely! Prepare the dough in advance, wrap it well, and refrigerate for up to 2 days before shaping and baking the cookies.
Store the fully cooled and iced cookies in an airtight container at room temperature for up to 5 days. If stacking the cookies, place parchment paper between the layers to prevent sticking.
Adjust the icing consistency by gradually adding more confectioners’ sugar to thicken it or a small amount of milk to thin it until it reaches the desired drizzling consistency.
Recipe Variations
Traditionally, Italian Easter Cookies are made with anisette flavor, which tastes like fennel or licorice. However, these cookies can also be made with lemon zest or extract, orange zest or extract, almond extract or vanilla extract if anise isn’t your cup of tea. {Many find it to be an acquired flavor.}
I like to keep the dough neutral with a vanilla extract flavor and add different extracts to the icing in order to flavor them, but you can also add lemon zest or orange zest to the dough itself if you would like the cookie to be flavored.
Italian Knot Cookies

25 comments
Paula Hendrick
Ciao! I will be trying this recipe for this Easter Sunday. My father was a baker and owned an Italian Bakery. He would make all types of Italian cookies, pastries. I am going to give these a try. Wish me luck.
thekitchenprep
How amazing to have had an Italian baker for a dad! I hope these turned out great for you, Paula!
Marianne Birdsell
I just made these cookies for Easter this year and they are delicious. I did make some changes (seems I can never bake or cook without changing something in the recipe. I added 1 tsp. of anise oil and 1 tbs. lemon juice for the flavoring. Also, I added 1 tbs baking powder instead of the baking powder/baking soda called for in the recipe. I did use the full 3 cups of flour. So good!
Terri B.
Just to clarify, did you add the 1tsp of anise oil and the 1tbsp of lemon juice to the cookie dough or the icing? If you added it to the cookie dough, what did you add to the icing for flavoring, if anything, and how much? I am planning on making these for a wedding coming up and have never made them. Thanks so much for your info. How many cookies does this recipe make?
thekitchenprep
That’s wonderful to hear, Marianne! Happy Baking!
Sera
Thanks so much for this wonderful recipe. They are a longtime family tradition. I’ve always used my mom’s recipe calling for a dozen eggs, a bottle of anise and “enough” flour…Always delicious but inconsistent as you might guess. Truly a labor of love. Well, your recipe always comes together quickly, handles easily and tastes great. I use the 1 tsp vanilla plus 4-5 tsp of anise extract,plus about 1/2 tsp in the icing. Definitely for anise lovers.
thekitchenprep
That makes me so happy to hear, Sera! Those beloved family recipes are so special but can be so hard to follow without precise measurements. My grandma was famous for this! I hope your family continues to make these and enjoys them in good health & happiness this holiday season and beyond!
Linda Parfitt
I made these cookies today for Easter. The dough was easy to work with and my knots came out beautifully. I made the glaze per recipe. It appeared to be a nice consistency. I made sure the cookies were completely cool before dipping in icing. As soon as I turned them right side up afterdipping, most of the glaze rolled off. I did add more confectionery sugar to thicken glaze up.
What did I do wrong? I plan on glazing them again tomorrow.
thekitchenprep
Hi Linda, I’m glad the cookies turned out well for you! As far as the glaze, sometimes you have to play around a bit with the liquid to sugar ratio to get the consistency just right so that it coats the cookies without completely running. It has happened to me before, too, and I think some of it has to do with using different confectioners’ sugar brands. I hope the re-glaze worked for you!
Lori
I’m saving this recipe for Xmas. My family loves these during the holidays. Just make them red & green icing. Anise is good but I’d rather save that for putzels. These I might try with some zest. Glad I found your page. Thanks!!
thekitchenprep
I flavor them with zest, too, since most people prefer that flavor. I hope they turn out great for you. Enjoy!
Angel
How many eggs are used in the recipe? Looking forward to making the cookies.
thekitchenprep
Hi Angel! You’ll need 3 eggs. I just updated this recipe and must’ve left out the eggs when I re-typed it! Sorry about that! Thanks for the heads up, I’ve edited the recipe card. Happy Baking!
thekitchenprep
@Anonymous – Hmm… I've only ever made & posted this recipe, but I'm sure there are lots of other versions out there! Do you prefer the flavor of almond (like amaretto) or a citrus flavor? I think they're both equally delicious! I think the almond or anise (licorice-type) flavor is probably more classic, but this one is lovely, too.
Anonymous
Help Im super confused… do you have 2 different recipes for this cookies? I found this one with lemon juice and zest but I also found a pin for the same cookie with almond, but it takes me to this recipe and do you prefer 1 over the other?
JP
You can make it with any flavor extract you want. It is delicious with almond. My grandma used to make knot cookies for Christmas. I made this recipe today.
thekitchenprep
Yes, they work well with all kinds of flavors — lemon, orange, almond, anise. All delicious! Hope you enjoyed them!
Anonymous
Can you freeze these?
thekitchenprep
I've personally never tried, but I don't see why not! Maybe leave the glaze off and glaze after thawing, though, as I'm not sure how it would hold up.
Anonymous
I made these yesterday and they were an instant hit! Thank you for sharing the recipe.
Megan Shaw
How many does this recipe make?
thekitchenprep
@Eftychia – Thank you!
@La Cipota – Thanks for the compliment! Hope you enjoy them!
@Anonymous – That's wonderful! What a sweet Valentine's gift. 🙂 Thanks for stopping by!
Anonymous
these are beautiful. going to make the for my family for Valentines Day!
La Cipota
Those really look amazing, I will definitely have to try them! thanks for the lovely post!!
Eftychia
These cookies look delicious! I like very much their decoration! Thanks for sharing.