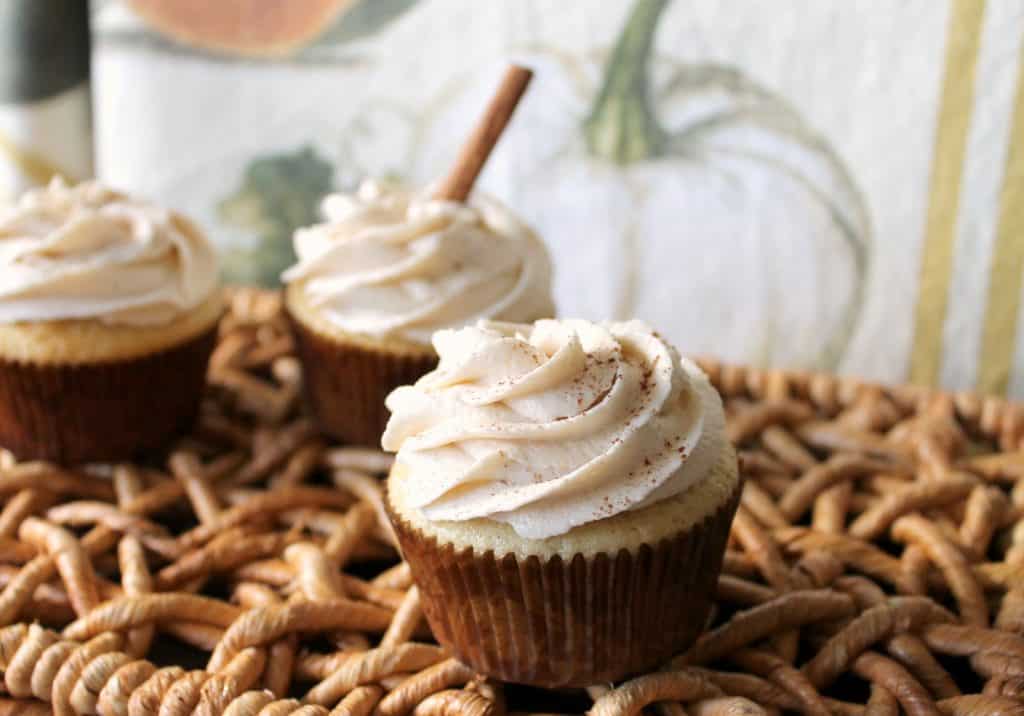
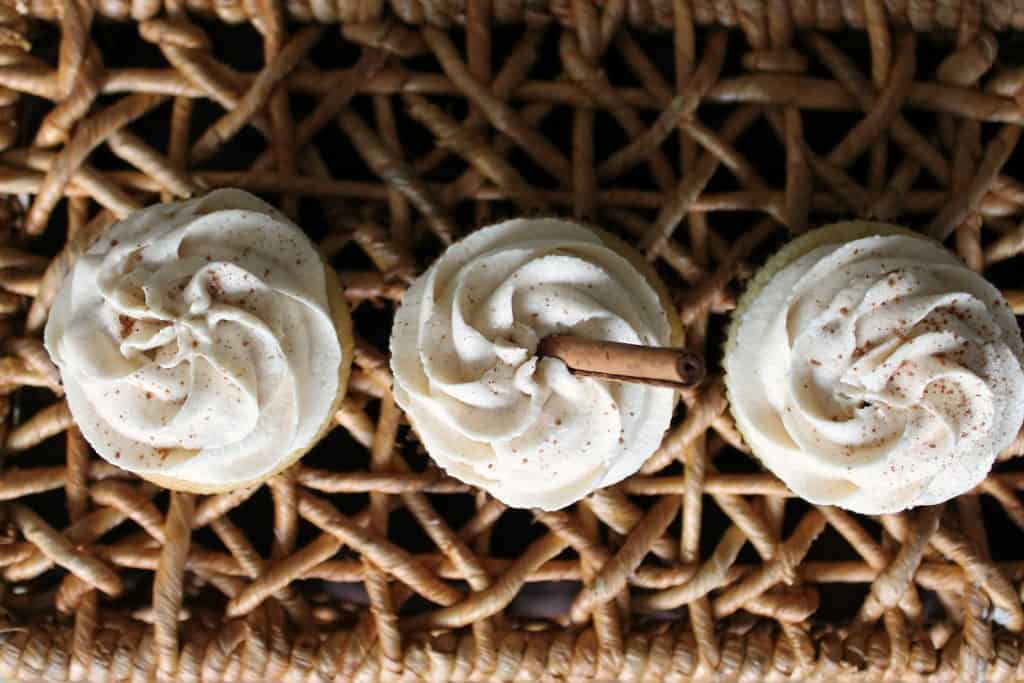
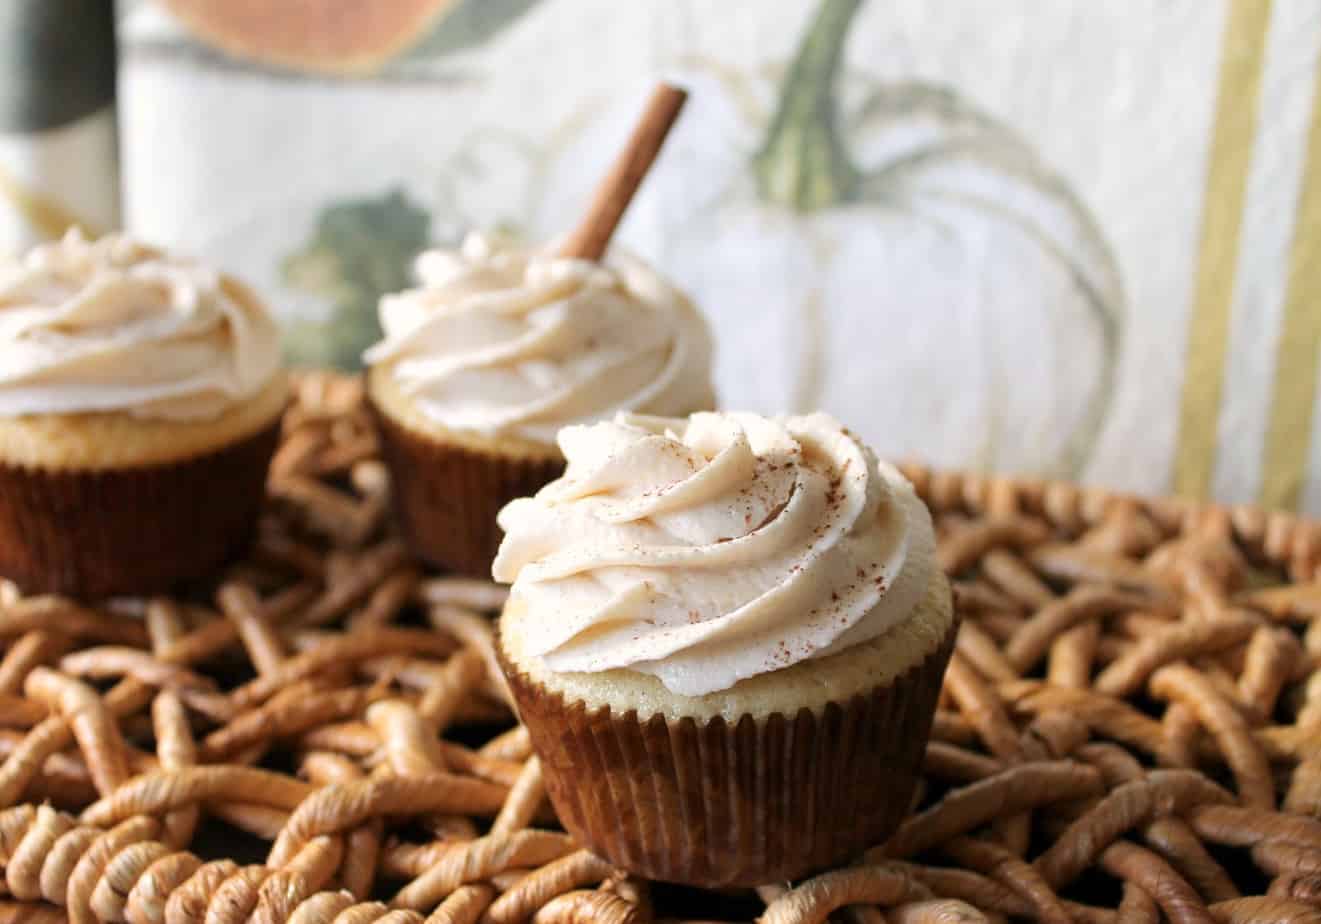
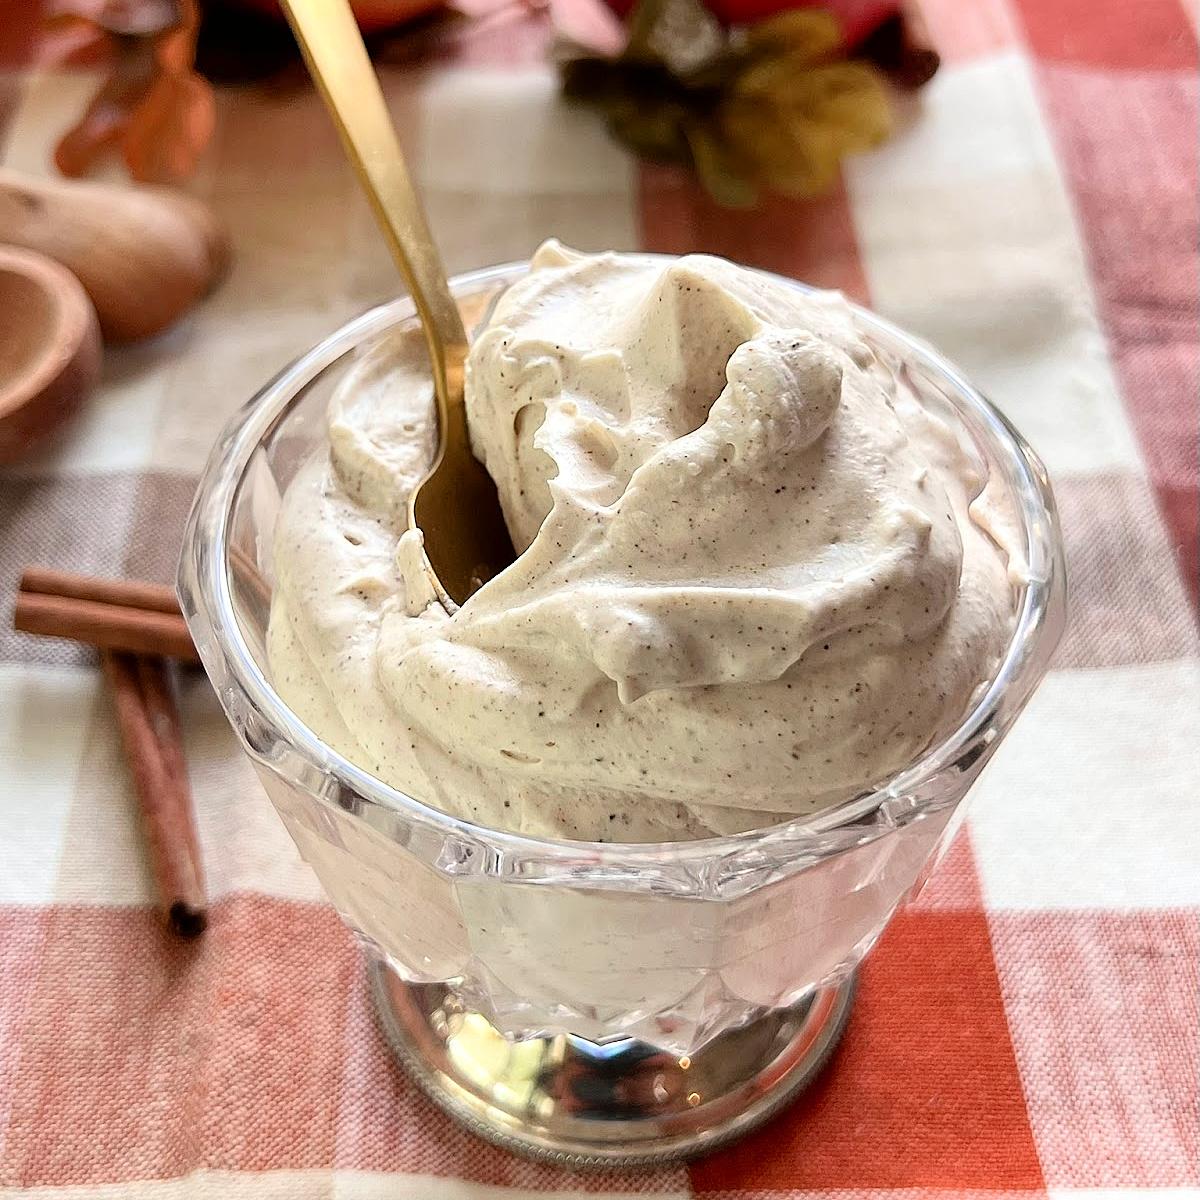
Vanilla Bean Cupcakes with Pear Butter Filling! If you’re ready for the flavors of fall, you’ll find them all wrapped up in this sweet treat: A fluffy vanilla-infused cupcake with a spiced pear butter center & brown sugar cinnamon frosting.
Let’s talk a little bit about great ideas, shall we?
I have them all the time. Ideas, like bolts of lightning, that seem to come out of nowhere and light up your brain with unlimited potential for success.
One of my most recent great ideas for the blog was starting my Tailgate Thursday series. When it came to mind as the end of the summer wound down, I could barely contain my excitement.
Fast forward to the beginning of football season, around the time of my second post. My enthusiasm for the project was still going strong. But oh, how I had underestimated the amount of time it would take to put together a cohesive post… every week… for TWELVE weeks. {P.S. We are now on week 8… but I skipped a week. So really I have 5 more schools to go.}
What am I saying exactly?
Well, I still love my idea. You seem to like my idea. Everyone seems to be fond of the idea.
But ever since I started working on my idea it seems that I Just.Can’t.Catch.Up.
Wednesdays have become a mad panic of last minute grocery shopping, cooking, photography, editing, and writing {not to mention occasional cursing & tooth gnashing}. Thursdays now arrive at alarming speed. Fall snuck up on me while I was busy fact checking information about college towns and mascots.
And so… as I mentioned in yesterday’s post, I have just not been on top of Fall baking around here. I still have full cans of pumpkin puree sitting in my pantry. And my collection of warm spices stare back at me with this pitiful look saying, “What have we done wrong?”
{Ok, maybe they don’t actually say anything, but if they could talk, that’s what they would say.}
But today, I’m making up for lost time, because this cupcake creation is basically autumn in cupcake form.

A tender Vanilla Bean Cupcake, filled with a gooey Caramel-Pear Butter center {I told you I’d put that stuff to good use!}, topped with a seductive swirl of Brown Sugar & Cinnamon Frosting.

I’m waiting for Bath & Body Works to call me any day now and ask permission to use this combo as one of their autumn candle scents. {Have your people call my people, B&BW.} ;)
I still have tons of stuff to do for Tailgate Thursday, but you can thank Julie from Willow Bird Baking for her autumn cupcake challenge this week for this creation… because she nudged me into the kitchen and unknowingly caused me to liberate my sad, sad Fall spices.
{You can also thank my friend and reader, Trina, for the inspiration because she wanted me to make a Pear & Caramel Cupcake… LAST YEAR… and that popped into my head when this challenge arose and materialized in the form of this cupcake.}

Anyway, enough chatter. If you’re still waiting for Fall to arrive in your kitchen, this is definitely a good place to start… and there’s no doubting that it’s a VERY good idea.
Vanilla Bean Cupcakes with Pear Butter Filling

14 comments
Sara Hamling
Hi! These look amazing. How many cupcakes does this make?
thekitchenprep
Sarah – About 16 standard sized cupcakes. 🙂 Hope you enjoy!
thekitchenprep
@April – Wonderful! So glad you enjoyed it! Thanks for stopping by!
April
I was looking for a cinnamon frosting…came across this…it is one of the BEST frostings ever! It's definitely a keeper in my book. 😀
thekitchenprep
@Sarah – Thank you! I'm pretty sure they make about 16 cupcakes. Enjoy!
sarah
hi, they sound fantastic! Can you tell me how many cupcakes you get out of the recipe? thank you so much.
thekitchenprep
@Tiffany – That's so great to hear! Thanks for sharing, I'm glad everyone enjoyed them! 🙂
Tiffany Rippa
These were fantastic!!! I used a different filling, but my coworkers have been RAVING about them!! Great recipe!
thekitchenprep
@Sarah – Oh goodness!! Thanks for catching that, it should be added in after the other liquids! Updating now. 🙂
Sarah
You never said anywhere in the recipe to incorporate the milk into the batter justletting you know:)
The Kitchen Prep
Thank you, Amanda! Let me know how your very first filled cupcakes turn out! 🙂
Amanda @ Once Upon a Recipe
Oh my, these sound lovely! I have never made filled cupcakes before, but I think I need to change that. And I love pears too!
The Kitchen Prep
Thanks, Julie! It's good to know even a pro like you has their moments. 😉
JulieD
Wow, that caramel pear butter filling sounds amazing and your photos are so cute!! Things always take me longer than I expect too…